


How to create Splash Screens in Flutter
Flutter Splash Demo was created to understand how we can create different types of Splash Screens both for Android and iOS.
As most of iOS developers would agree that creating iOS Splash screens can be a bit of a hassle due to the OS specific limitations, on the other hand, creating Android Splash screens is merely a cake walk. Now, with the advent of Flutter, I think this can is greatly reduced.
The Problem Statement
To create an app that showcases different types of splash screens namely:
- Image Splash
- Video Splash
- Animated Splash
Import Image/Video Files
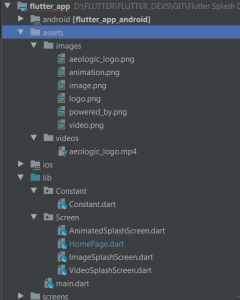
We need to import the image files into the project. It is common practice to put image files in a images or assets folder at the root of a Flutter project. Since we had to use both images and videos we created separate folders and added them in assets folder.
Declare the assets in the pubspec.yaml
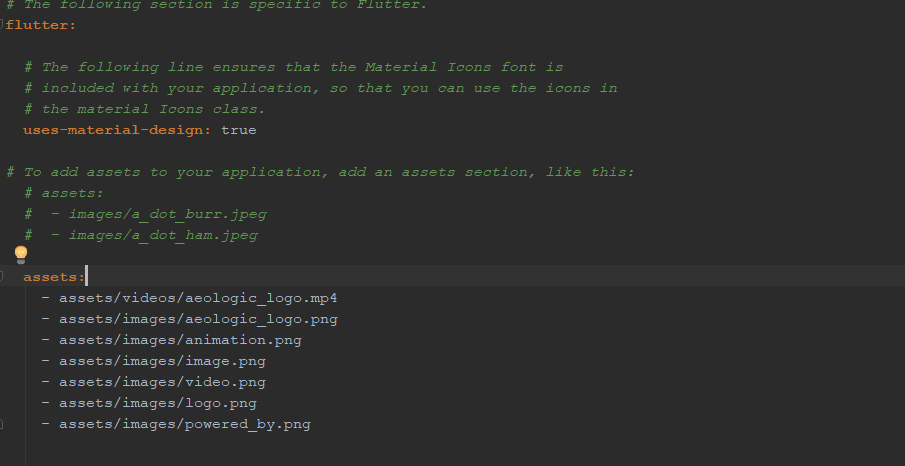
It is imperative that you add all the assets in the pubspec.yaml file. You can check more about adding assets from this link.
Let’s Code It
As soon as you start to code you get a lot of boilerplate code ready to be worked upon. If we take a look at our main.dart file you can see that we have removed all that code and it’s a bit different than what we see on every other code snippet.
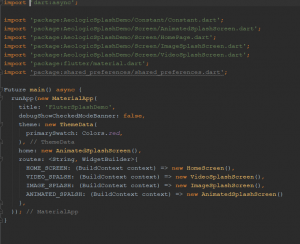
We have used something called as Routes, which is used for routing screens or you can say navigating to different screens of the app.
So, we’ve created 4 named routes namely HOME_SCREEN, VIDEO_SPLASH, IMAGE_SPLASH, ANIMATED_SPLASH that will be used to navigate to the different pages of the demo app.
VideoSplashScreen.dart Class

VideoSplashScreen extends a StatefulWidget since we need to change it’s state during runtime so we require a StatefulWidget.
VideoState Class
VideoState class extends VideoSplashScreen class. It contains the whole logic of showing the video and moving to the next screen. Let’s take a look at some of the important methods used in this class.
initState Method
If you’re an Android developer then initState is your OnCreate method and if you’re an iOS developer then ViewdidLoad/viewWillAppear is same as initState method.
initializeVideo Method
This method is used to instialize VideoPlayerController.
startTime Method
This method is used to create a timer to move to the next screen as soon as the video or timer finishes.
ImageSplashScreen.dart Class

ImageSplashScreen extends a StatefulWidget since we need to change it’s state during runtime so we require a StatefulWidget.
SplashScreenState Class
SplashScreenState class extends ImageSplashScreen class. Some of the important methods used in this class are mentioned below.
startTime Method
This method creates an async that is called after 2 seconds to move to the next screen.
AnimatedSplashScreen.dart Class

AnimatedSplashScreen extends a StatefulWidget since we need to change its state during runtime so we require a StatefulWidget.
We’ve created an AnimationController with a duration of 2 seconds and we added an animation by the name of CurvedAnimation.
So that completes all the details for this Splash Demo App. Let us know if you have any issues with the project.
You can get the full source code from our GitHub repository.
FlutterDevs team of Flutter developers to build high-quality and functionally-rich apps. Hire flutter developer for your cross-platform Flutter mobile app project on hourly or full-time basis as per your requirement! You can connect with us on Facebook and Twitter for any flutter related queries.
Post a Comment
You must be logged in to post a comment.